Judging by the numbers, WordPress is the world’s most popular Content Management System (CMS) in use today – and it’s growing.
According to W3Techs, a website that provides information about the usage of various types of technologies on the web, as of January 2016, WordPress is used to power “59 per cent of all the websites whose content management system we know.” That means it powers 25.7 per cent of all of the world’s websites. In comparison, Joomla (another CMS) powers 2.8 per cent, and Drupal 2.1 per cent.
Do you need any further convincing? No? Then let’s move along. Here’s how to install WordPress.
Things you need before installing WordPress
It is worth taking a moment to remind you about the difference between WordPress.org and WordPress.com. WordPress.com is a free, hosted website service. If you want to set up a site there, you do NOT have to follow these instructions. Just head over to WordPress.com to get started.
These instructions are for a self-hosted WordPress install, using the free software available from WordPress.org.
Self-Hosted WordPress Installation
Before you can get down to the business of installing WordPress, you need to have a few things in order. You will want to have a hosting account set up, and a domain name pointing to that host (and, fully propagated).
You will also need to set up a database at that hosting account, and then you will want to have that database information handy. You will also need to be able to FTP into your hosting account (these login details would come from your host), likely with an FTP program like FileZilla or Transmit.
(Also, please note that some hosts offer one-click solutions to WordPress installation, in which case, the instructions below won’t apply.)
Download and unzip the files
Now that all the information has been assembled, let’s head on over to WordPress.org to download a copy of the latest version of WordPress.
After it has downloaded, unzip the files to your hard drive.
Upload to your host
Now, log into your hosting account via FTP. Move all of the files from the un-zipped WordPress folder (on your hard drive) into the root of your hosting account. You won’t need to copy over the “wordpress” folder that all of the files are in – this can be left behind.
In most cases, the root folder of your website will be the public_html folder, but your host will have told you if it is set up other wise.
Famous Five Minute Installation
Now it’s time to start the “Famous Five Minute Installation.”
Open up your favourite browser (I like Chrome) and visit your installation URL (For example, http://example.com/wp-admin/install.php).
This will automatically start the installation script. Here, you enter your database name, database user name and password. (This is all information you would get from your hosting account.)
The following images are from WordPress.org Codex.
Next, you will enter your Site Title, a username (for security reasons, this should not be “admin”), a secure password, and the email address that will be affiliated with your account.
The “Privacy” checkbox indicates whether you want search engines like Google accessing your account – chances are, if this is a new account under development, for now, you will NOT want them to index it. (You will change this later.)
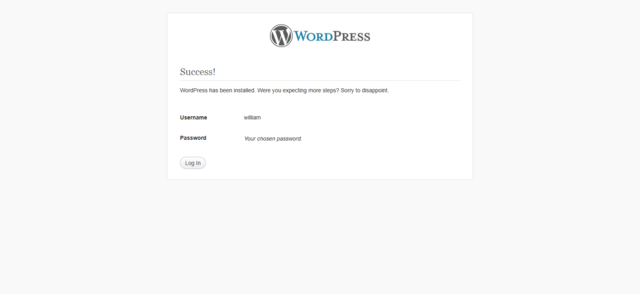
Then you click the “Install WordPress” button at the bottom of the page, and like magic, WordPress is now installed.
Troubleshooting your WordPress Installation
If you aren’t yet familiar with the WordPress.org Codex, check it out. In addition to “how-to” documentation, there is also a user forum with solutions to many common WordPress problems. The section on WordPress Installation, which includes more information as well as troubleshooting information about your installation, can be found here.


